DIY Foam Aquarium Backgrounds and Caves: Easy Fish Tank Decorations

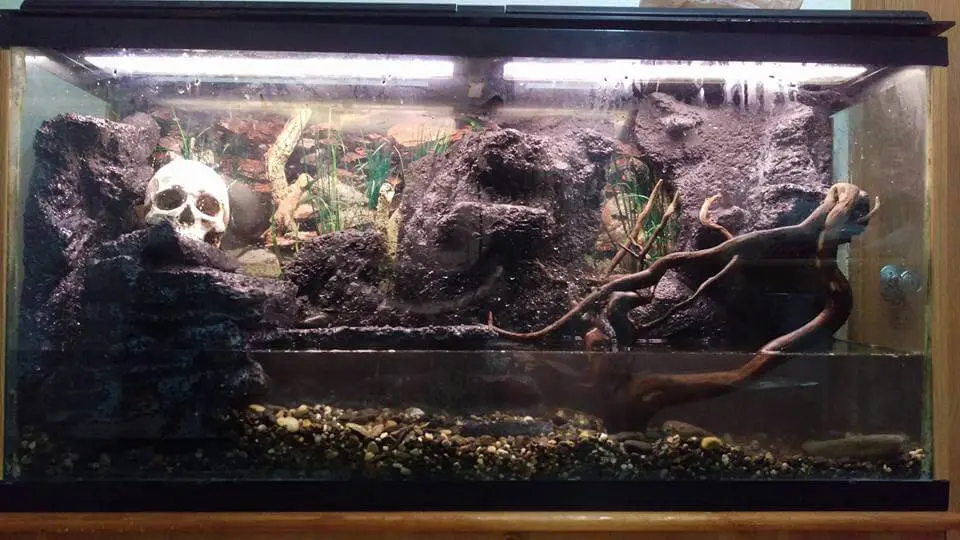
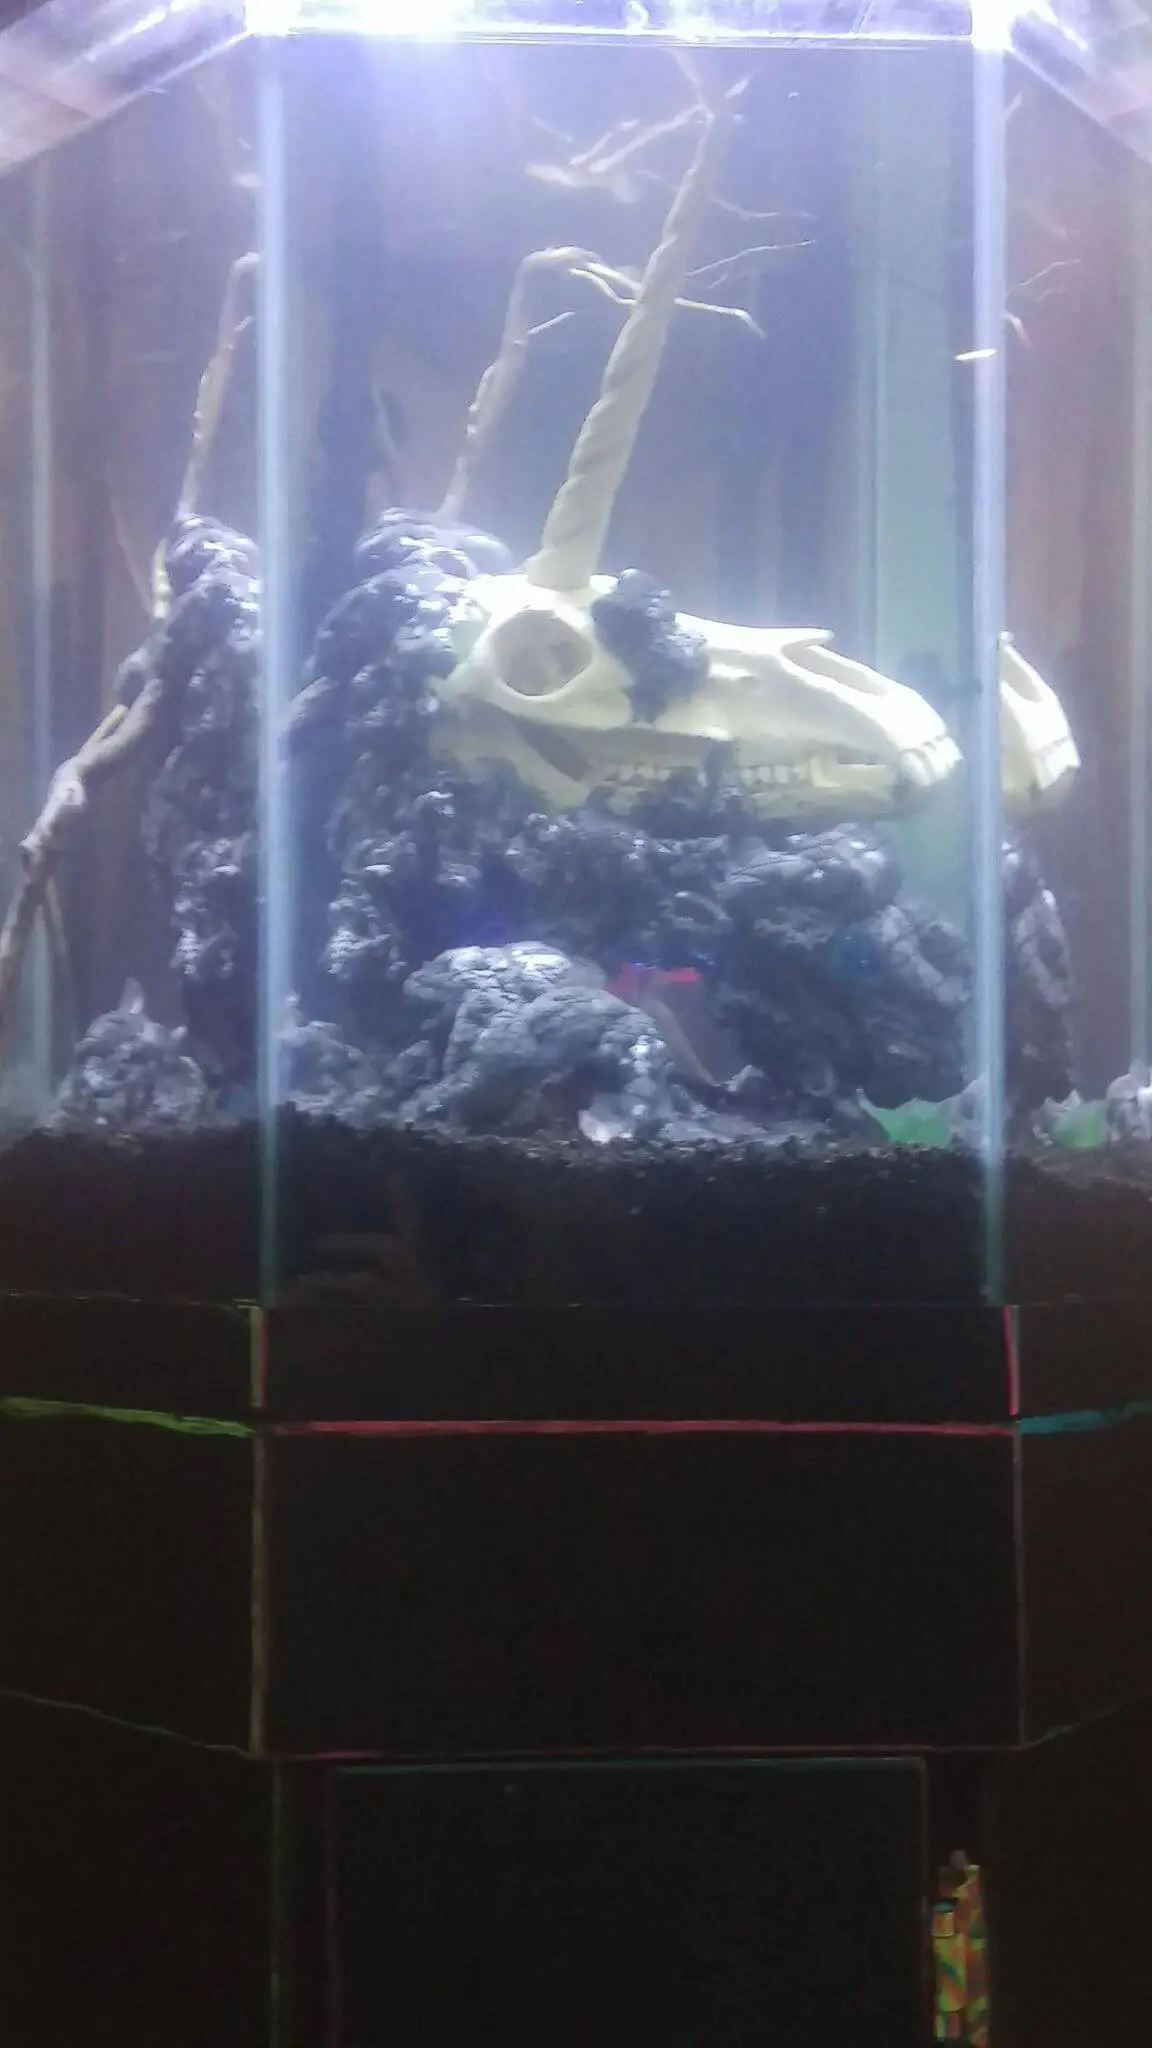
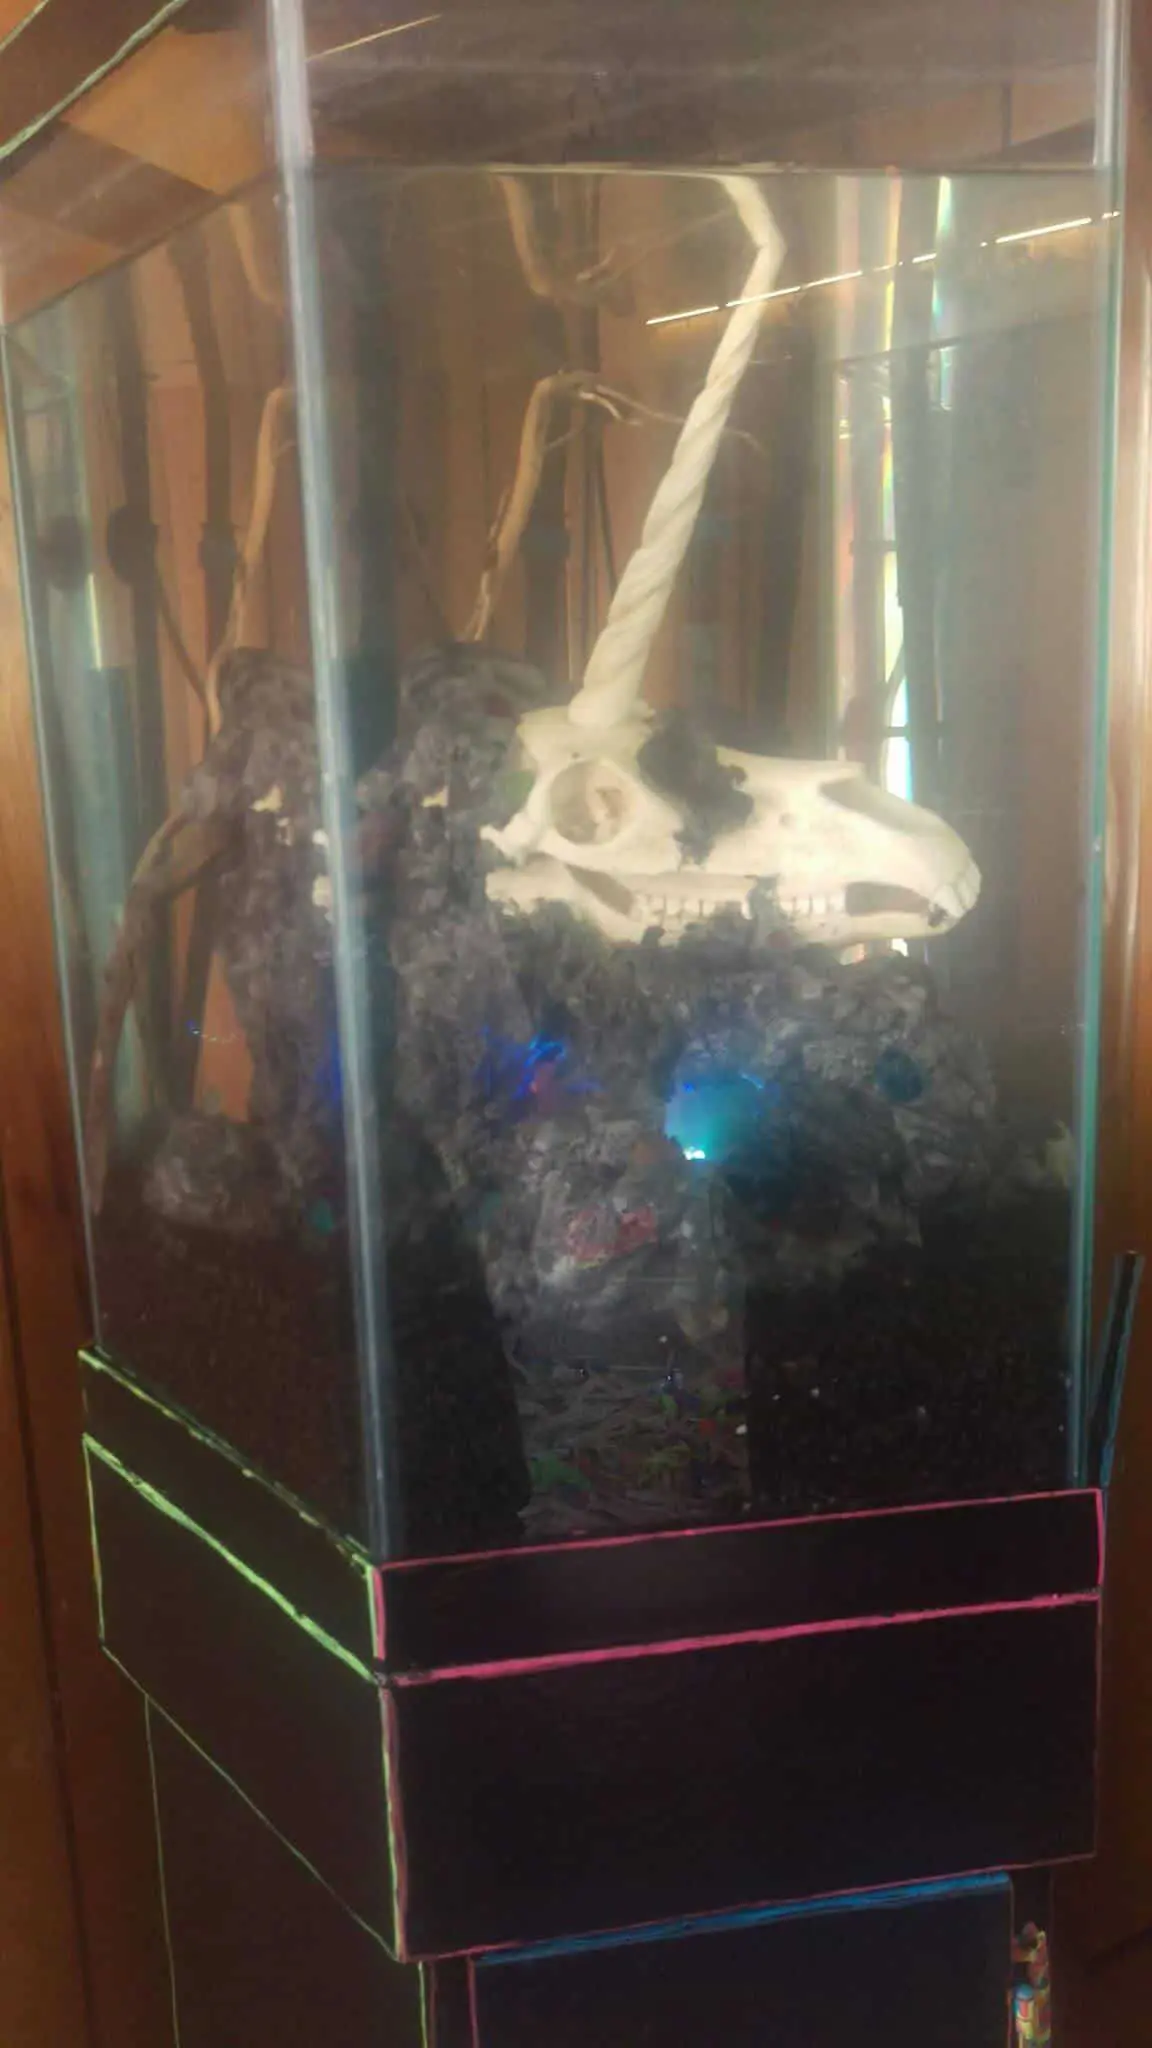
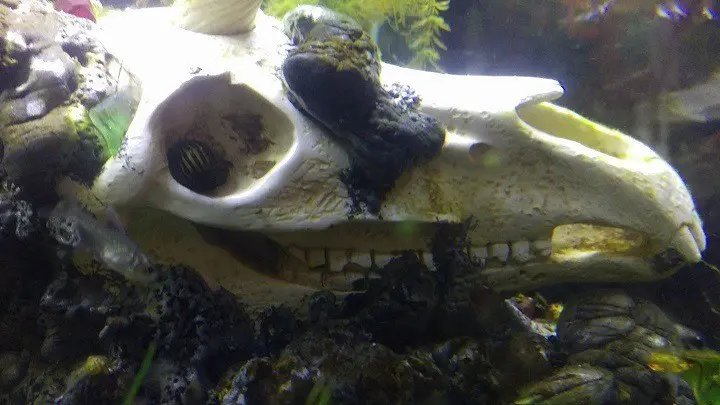
The first time I saw this awesome realistic unicorn skull, my immediate thought was, “that needs to be in a fish tank!” and not just in a first tank, it needed to be the center piece. I got this elaborate vision of a rock encrusted fallen unicorn turning all the neighboring fish into rainbows. The answer to making that vision a reality was a DIY 3D foam fish tank background or cave I suppose in this case. I have done a full foam background before, but I lost most of my process images in a phone failure. I will include instructions for both methods, but images for the full background version will be fewer.

Alrighty, first off, what do you need to make a DIY 3D aquarium background or cave?

As mentioned there are two popular ways. One involves building a foam block from foam slabs, carving that foam into your shape, and then sealing it. The second involves spraying out your shape with pond spray foam and embellishing that to look more like your desired shape (rock is the most popular choice, but people also sometimes do trees). The full 3D background I did was the slab method, the unicorn cave was done with spray foam.

For the slab method:
-Foam slabs: I got mine free from a furniture store trash can (with permission).
Aquarium silicone
Drylok and cement colorants: I used grey Drylok and tinted it with black to create two tones.
-Sharp knife
-Shop vac

For the spray foam method:
Pond and landscape spray foam
-Parchment paper and gloves
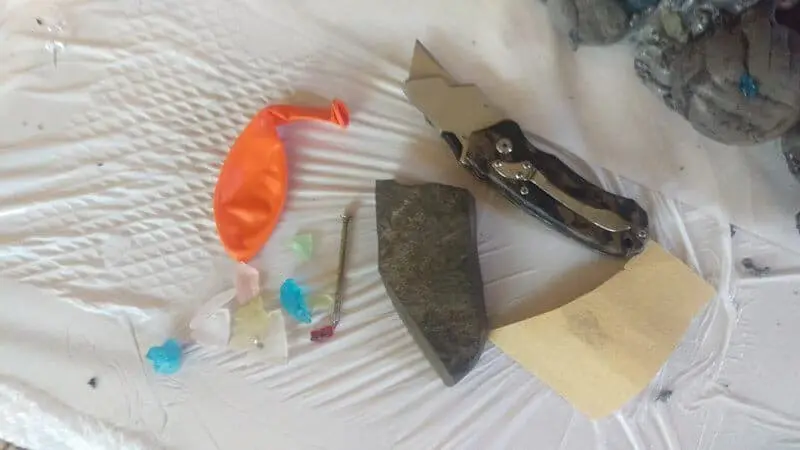
-Tools for design such as a nail, sand paper, jagged rock, razorblade

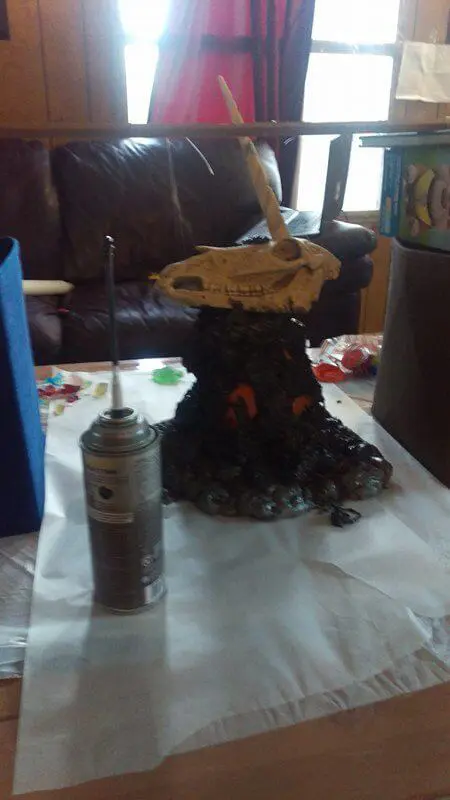
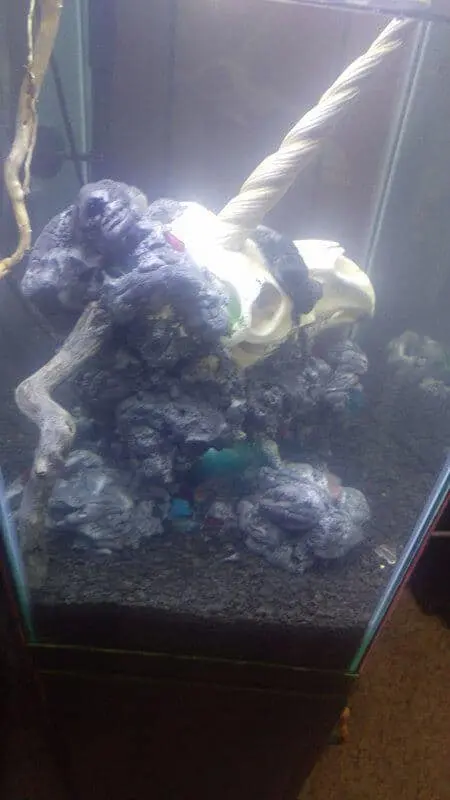
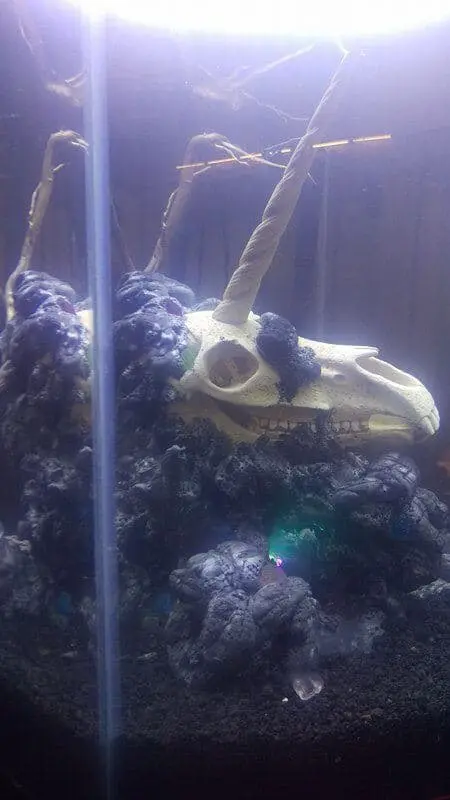
With either method you can accessorize. My full 3D fish tank background used a resin skull and the output house of a canister filter to create a water fall. My unicorn cave obviously used a unicorn skull, but also beach glass “jems” and a color changing LED disc. Inserting the skull and creating a cave also required a balloon and fishing line.

Cost wise, the spray foam method is cheaper. This is because Drylok is relatively expensive ($25-30 a gallon, the 60 gallon long tank in this post took an entire gallon). The unicorn rock sculpture in this post took two cans of spray foam at about $4 a can for comparison. It is in a 30 gallon hexagon tank. The stand for that by the way, with a rainbow effect, was done by painting an old wood stand black and using neon paint markers.

How to build a DYI foam fish tank background or caves method 1:

-Stack your foam pieces in the rough shape of your design. I recommend measuring your tank and sketching out your desired design. You can also place it in the tank to get an idea how it will look. In the pic below I had already begun the carving process.

DIY Foam fish tank aquarium background

-Use aquarium silicone to glue the chunks together. Place a heavy object on top and allow to sit overnight for a tight seal.

-Once dry, carve your desired shape. In my background I added lots of platforms, as this tank was for semi-aquatic newts. I used a kitchen knife to carve, pulling in quick downward motions until I got shapes I liked. This is a very messy process. Seriously, there will be tiny bits of foam everywhere. Opting for a small space, such as a bathroom tub with a shop vac handy is the easiest way to keep things contained.

-Paint your creation with Drylok. In my case I used grey, then tinted the remaining paint in the gallon with black cement colorant and did a light brush over the surface to catch only the risen texture. You can get other colors to create more detail if you wish. Drylok requires no overcoat, once fully dry you can put this directly into your tank.
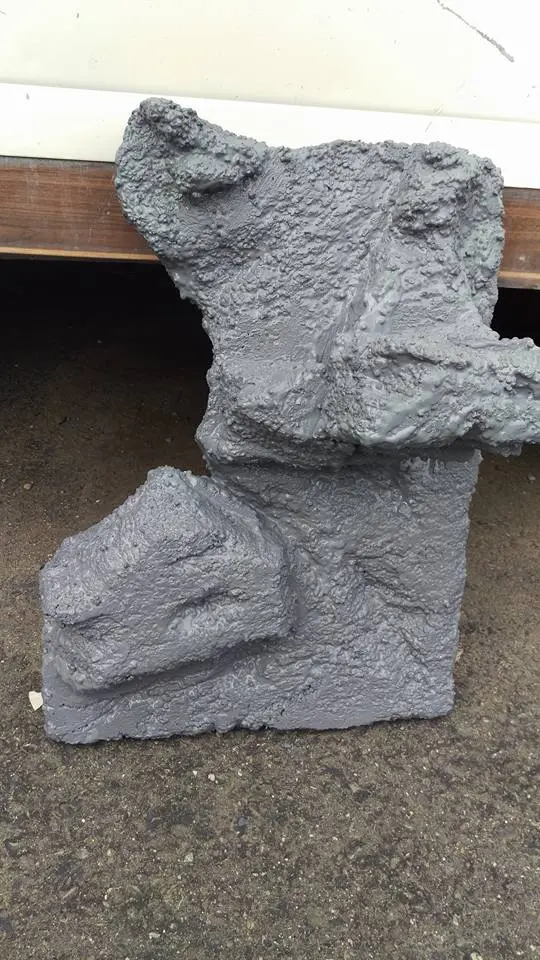
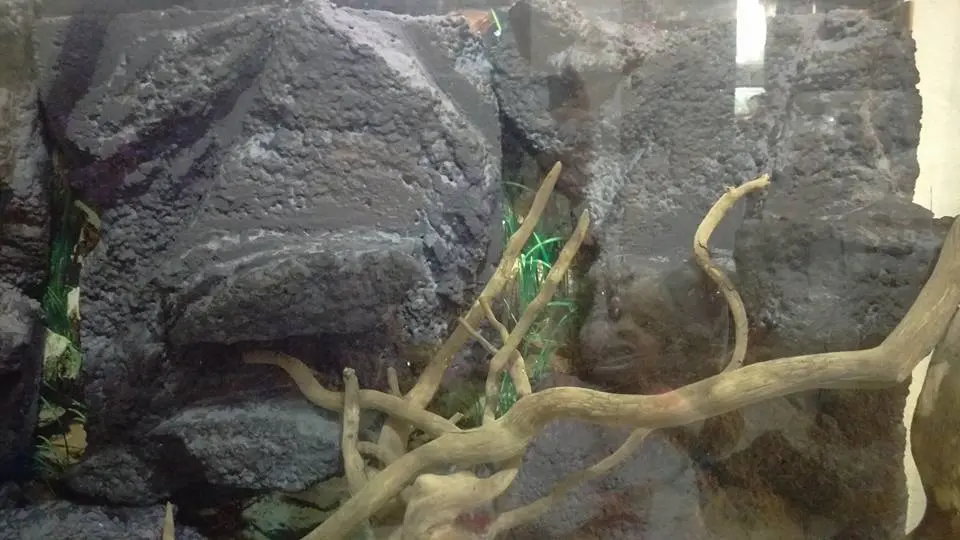
DIY Foam fish tank aquarium background
First layer plain Drylok


DIY Foam fish tank aquarium background
After tint layer

-To place the foam in your tank you need to adhere it. I siliconed mine to the glass itself (which means it can’t be removed), but I have seen other folks use nifty methods such as magnets to avoid this. I can’t speak to that process, because I took the easy route.
DIY Foam fish tank aquarium background

-Once the silicone is fully dry (give it 24 hours), you can fill your tank and begin to let it cycle.

How to build a DYI foam fish tank background or cave method 2:

Of the two, I found this method far easier and cleaner, but it would be more difficult to create platforms with spray foam. I would say method 2 is the way to go for caves, method one better for backgrounds, but you could also combine the methods.

-Create a work space by laying down parchment paper. The spray foam won’t stick to this, and it makes for easy clean up. You also want to wear gloves. Spray foam will NOT come off skin. Trust me, I tried everything from nail polish remover and vegetable oil to goo-gone. If it gets on your hands, you have to wait the week or two it takes to wear away.

-Sketch your design out and setup any accessories. In my case, I measured the height I wanted my unicorn skull in the tank, then hung it by fishing line from a stick at that height in my work area. This held it in place while I built up the foam rock around it.

DIY Foam fish tank aquarium background cave

-Begin spraying the foam. You may have to work in layers. I sprayed out a base, placed a balloon on that base to create the hollow, then sprayed layers around the balloon until my skull was properly encased.  I added beach glass as I went. The layers soft dry fairly quickly (30-45 minutes), but your entire project you’ll want to let dry at least 24 hours before putting in your tank.

-Once fully dry, you can add texture to the foam to make it more realistic. I poked the surface (a lot) with a nail to create a coral-like effect (this is time consuming I’m afraid), smoothed surfaces with sandpaper, and used a sharp rock to create lines for the tide-swept look. The spray foam cave in my pictures is not painted at all. The sanded surfaces simply appear a lighter color because the top coat is removed.

DIY Foam fish tank aquarium background

-All that’s left after that is to silicone it to your tank and begin cycling. I will throw in here I originally attempted to build my foam cave on top of a flat, heavy beach rock, but it floated anyway. Spray foam is highly buoyant. You are welcome to try the rock method, but I recommend having aquarium silicone handy as a back-up plan.

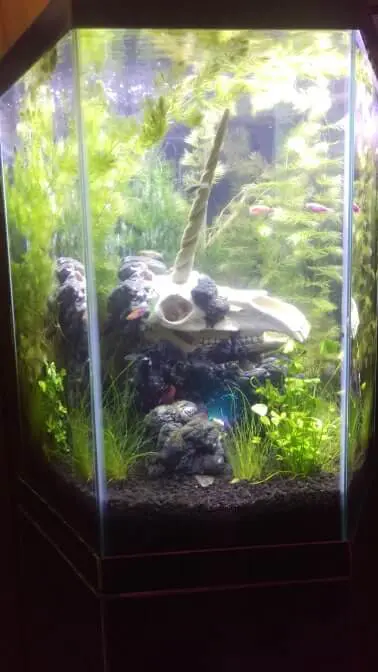
Both of these tanks will be planted. I will update this post as I add plants, fish, and other critters so you can see how they progressed. If you likewise plan to create a planted tank, keep in mind a thick layer of special substrate is recommended as well as adequate lighting.

Skull newt tank with moss:

More pictures and a video of the unicorn tank (planted and stocked with glofish):

DIY foam fish tank cave unicorn DIY foam fish tank cave unicorn DIY foam fish tank cave unicorn DIY foam fish tank cave unicorn
DIY foam fish tank background unicorn planted tanknerite snail in unicorn fish tank skull eye

Stinky Dog? How to Get Dog Smell Out of the House

Dogs, well, they smell. Some dog breeds are more prone to being stinky than others, but unless you take steps to avoid it, if you have a dog, your house will also smell like dog. Whether you just got a new puppy, or you’ve just discovered your house already smells like dog, fighting the smelly dog house problem isn’t really a one-step process nor a one-time one, but less unfortunately, it also isn’t hard. So, where do you start?

dog smell house checklist

With the dog. The first step in keeping your house from smelling like dog or getting rid of the smell of dog in your house is to keep the dog clean.

Keeping your dog less-smelly:

You should aim to bathe your dog about once a month. Over-washing can lead to skin issues though, so try not to be more frequent than that unless your dog has gotten himself into a wash-worthy mess. You can also use an odor control shampoo such as Nature’s Miracle Supreme Odor Control. After bathing dry your dog or confine him/her to their kennel to dry. If you set a wet dog loose in your house, he’s bound to rub, roll, and spread wet dog stink all over your home. This is also a good reason to clean the bathroom after baths.

Between bathing, brush your dog weekly with a good de-shedder followed by a slicker brush. This cuts down on shedding and dander, while keeping your dog’s coat healthy.

Next, you want to keep your dog’s bedding clean, so he/she stays cleaner. If your dog has a crate with blankets or bedding or even just a dog bed, wash it weekly with a deodorizer. I’ve found an Oxyclean soak works well. You may find it easier to have two blankets/beds so that your spoiled furry friend doesn’t have to go without bedding while it deodorizes.

You can also place a pet-safe deodorizer near your dogs most frequent sleeping location. Keep in mind that heavily fragranced options can be dangerous to dogs. Even natural options such as essential oil diffusers are not a good idea. You want something that absorbs odors, not masks them, things like baking soda or charcoal. I like to use a charcoal-based closet deodorizer clipped to my dog’s crate like so (the clips are just book rings from the office supply section), but no matter your choice, also take care that your pet can’t access and so destroy whatever it is (especially puppies).

Keeping your house from smelling like the dog:

Now that you’ve minimized the stink of your dog, you want to keep that minimized stink from settling into your house. This is particularly important if you have carpet, which can really hold on to odors.

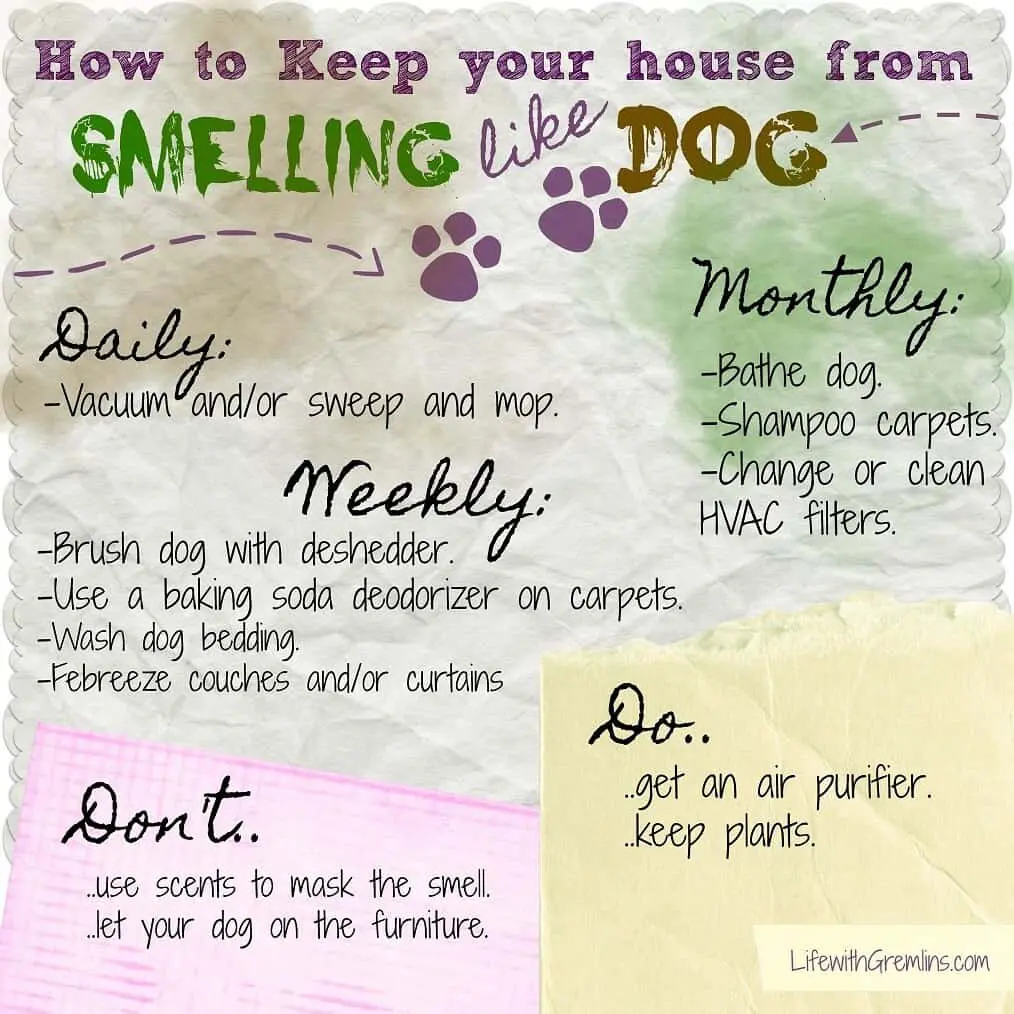
Vacuum or sweep/mop the areas where your dog frequents daily. You may not be able to see it (until you’re cleaning it up at least), but you’d be surprised how much even a well-groomed dog can shed in a day.

If you don’t have carpet, a steam mop that kills bacteria is a great option that makes mopping faster and chemical free.

If you have carpet, about once a week consider using a baking soda deodorizer before vacuuming, and about once a month consider shampooing your carpets. Particularly if you start with your dog at puppyhood, a home carpet shampooer is an invaluable investment. Any accidents during potty training can easily be cleaned up, and you can continue to use it throughout your dog’s life to keep your carpets from smelling like dog.

If your house already smells like dog, and you’re playing catch up, I’ve successfully de-dogged the stinkiest of carpet by vacuuming thoroughly, shampooing with Bisselll Professional Pet Odor Eliminator coupled with PetBoost Oxy, followed by the application of baking soda while still wet. Once it dries, vacuum off the baking soda. If there’s a particular room that still smells, you have to sniff for problem areas. I know this sounds funny, and you look funnier doing it, on your hands and knees sniffing at the floor, but it’s necessary. Chances are if a room smells of dog after the above cleaning a dog has pottied in the room. You’ll need to use a non-ammonia based cleaner such as Nature’s Miracle Odor Eliminator on the spot. Then re-shampoo the area.

If you have cloth couches, curtains, etc. deodorize them with something like Febreeze or a home-made natural version once a week or so. If pet dander particularly bothers you or you have allergies, I also suggest keeping a lookout for deals on leather furniture. While pet paws can more easily damage leather (another good reason to keep Fido off the couch), keeping it clean and odor-free is far easier.


Finally, keep the air in your home clean.

An air purifier can not only reduce allergens and improve air quality for you, but it also will help keep your house from smelling like dog. You don’t necessarily need something big and expensive, a single room unit such as this one in the room your dog chills in the most is an inexpensive huge help.

Plants act as natural air purifiers while also increasing humidity. There are a wealth of low-maintenance, impossible-to-kill options out there that can even survive on low light such as spider plants and ivy. A good rule of thumb is one plant per 50-ft.

You also want to change any filters to your heating system more frequently (every 30 to 60 days is a common recommendation with pets). Vacuum out any heating vents or air intakes when you change your filters. This may not apply depending on the type of heating in your home.

I know this all sounds like a lot, but much of this routine is easily integrated into an existing cleaning schedule, and the pay off—a dog without the dog stink—is well worth it.

Whistle 3 Pet GPS Tracker Review: Will It Work in Alaska?

I’m going to be honest, I had no idea GPS trackers for your pet even existed before an ad popped up for one while I was researching wireless fences. For once, internet advertising got it right. I recently got a new puppy and living in a semi-secluded lot in Alaska, it didn’t occur to me to contain him until I got a call from my neighbor asking if he was lost. The main reason a GPS tracker appealed to me is it would allow me to see if my little fuzz-butt was actually wandering or his excursion was a one-time deal, and I could easily find him if he did make another journey. As an added bonus, as these trackers aren’t hyper popular in Alaska yet, most would-be dog thieves would have no idea he was lo-jacked.

After switching my research session to dog GPS tags, I settled on the Whistle 3. Overall, it seemed to be the highest recommended and it uses AT&T cellphone towers, a network that exists and has decent coverage in Alaska. I’ve been using it a little over a month now and figured why not review it here on Life with Gremlins for other curious fur-baby havers. I will take this moment to disclose I have no affiliation with the folks over at Whistle. I paid for my tracker and this post was not sponsored in any way. It does, however, contain a referral links, which any Whistle customer has access to.

That bit over with the most important question to me once I got my Whistle 3 GPS tracker, was is it accurate and reliable?

How Reliable is the Whistle 3 GPS tracker?

Living in Alaska, it’s not uncommon for there to be no cell service. Heck, sitting here in my living room I have 1 bar, so a big concern for me was whether this tracker, that relies on cell towers, was going to consistently and accurately be able to find my dog. Before I even put it on him, I tested it.

I just so happened to be going on a 2-hour road trip to a nearby town, one I had taken many times before and knew had a blackout area signal wise. I mean no internet. No cell service. No radio even. I was pretty impressed to find the Whistle 3 did manage to track the vast majority of my trip, cutting out after my cell signal did even, right around the time my car radio signal went out. You can also see in the screenshot below it picked back up when the signal did, though with less consistent pinging. This was because I started a “tracking” session right as I left the “home” zone for my tracker, and I was driving when the signal came back, so I didn’t start a new tracking session. We’ll get to the difference there in just a moment.

Whistle 3 GPS pet tracker review

At home, where as mentioned the cell signal sucks, it has consistently alerted me when my dog has left the home zone, and tracked him outside of it. Here’s a shot from the other day where he was playing with his new dog friend (who lured him to my neighbor’s house and started this whole tracker business to begin with).

Whistle 3 pet GPS tracker review

Overall, I would rate the reliability and accuracy of the Whistle 3 tracker A freakin’ plus. If it can track on the Alaskan road and in the boonies, then it will likely be accurate anywhere.

How does the Whistle 3 GPS tracker work?

After I established it worked, that’s when I really got curious about what all it did and didn’t do.

Setting up the tracker was pretty easy. It came with very clear directions. Just twist it into the charger overnight, once it’s charged, clip it on your dog’s collar. The tracking box is relatively small, about half the size of a deck of cards and similarly thick. It weighs far less than a deck of cards though. Here’s a picture of it on my 4-month-old German Shepard mix. He is about 20-25 lbs for size reference. I have seen other reviews put them on cats, so they can be used on smaller critters, though personally, I do wish the tracker was a bit smaller.

Whistle 3 pet GPS tracker review blue eyes german shepherd

To use the tracker, you also need the Whistle 3 app. Pay attention to which you download, it does appear there different apps for the original Whistle GPS tags and the newer Whistle 3 tags which are smaller and have more features. I downloaded my app from the Google Play store for Android, but there is also an iOS version for Apple users. It’s a small app with great ease of use.

Tracking Your Pet with the Whistle 3:

Obviously the main function of this tracker is to, well, track. Once you have your app installed, you can set multiple “home” zones. These are areas you can define with a border as to where your pet should be. If your pet wanders beyond your set (and adjustable) border you’ll get a notification on your phone that your pet has left home.
Whistle 3 pet GPS tracker review

Initially, I was disappointed in how quickly that alert occurs. When I tested my tracker that first day off-dog, I found it took a little over 5 minutes to notify me I was no longer at home (though it did accurate judge how far I’d gone). Later I discovered there is a settings page on the app that allows you to edit your pet’s info, set notifications settings, and also change how often your tracker is pinged for location. I was set to 5 minutes by default. The shortest time frame it can be set to is 3 minutes.

The reason this is set to 5 by default is to preserve battery life. Though if your dog mostly chills near enough to your home to be in Wifi range, say asleep in your living room like mine, this isn’t a big concern. Your tracker will remain connected to Wifi if in range and it won’t be pinged at all. I found when my trackers location says, “at home” that means my dog is within range of my Wifi, if it says, “near home” it means he is in my set home region, but not within Wifi range. If he leaves the home border, it will say how far away he is (example/ 200 ft).

If your pet leaves the home zone, your notification of this will also ask if you want to track your pet. During a tracking session your pet’s location is updated every minute, rather than at your set rate. This is why back there in my test the beginning tracking dots are almost a solid line, but when the signal kicked back in, and I didn’t restart the tracking session, the dots are sporadic. The tracking session will also show you a neat little map of where your pet went (like in my playing dogs screenshot back there).

What else does the Whistle 3 GPS tracker do?

Notice I said main function back there. The Whistle 3 tracker also acts like a Fitbit for your pet in that it tracks activity levels. For me this was more just amusing, for example to get an email my puppy is active 136 more minutes a day than similar dogs of his age, breed, and size made me chuckle. For folks with dogs that have health issues (such as being a fatty) setting activity goals and tracking how much rest and exercise they’re getting could certainly be useful.
Whistle 3 pet GPS tracker review

How good is the Whistle 3 Tracker’s battery life?

Alright, so next question, how much work is this thing to keep up with? Whistle’s FAQ states the trackers battery lasts up to 7 days, depending on how often you’re in Wifi range, how frequently you have the tracker set to update, and how often you use the track feature. My pup is in Wifi range most of the day, I have to charge mine every 8 to 10 days thus far.

The nice thing about the design on this tracker is it twists off the clip on your pet’s collar. The clip itself is a flexible plastic and it is kind of hard to get on and off (which is a good thing being a lost tracker doesn’t help you track your pet, even if you could find it easily). The tracker itself twist-clicks into place on that clip, so it’s very easy to remove and place on the charger at night when the battery gets low. The charger is USB-based, so you will need a computer, laptop, or USB plug box for charging. It does not come with one, and there is no wall plug. That I did find a little inconvenient if it’s not something you have on hand.

Finally, what does the Whistle 3 tracker cost?

It’s all well and good if something works and is easy to use, but whether or not it’s cost effective really is the deciding factor for a lot of people. Initially, the Whistle 3 is more expensive than some other trackers (be wary of Bluetooth trackers that only work if in range of your phone, they are far cheaper, but don’t work well for obvious reasons). From Amazon with Prime shipping the Whistle 3 runs $79.95. The cost is the same direct from the Whistle site though, and with the referral link I mentioned, you’ll save $20 paying $59.95 with free shipping (even to Alaska!). This tracker also requires a service for cell phone tower use, and there is a monthly fee for that. If paid monthly, the fee is $9.95 a month. If you pay an entire year at once, it’s $95.40 ($7.95 a month), and if you pay for 2 years, it’s $166.80 ($6.95 a month).

For me, the fee was worth it to find out if my dog is staying home and likewise to ensure I could get him back if taken, but honestly, if he wears it for the year I paid for and I find he doesn’t really go anywhere, there’s a good chance I’ll cancel. I’d say that will probably be the answer for most folks. If you have a dog that likes to run or live in an area where dog theft is a problem, the fee is worth it. If your dog is well contained and rarely leaves home, it may not be for you depending on your financials.