As a family of five, it’s not always easy for us to decide what to make for dinner. Initially, we did a lot of internet searches like “dinner ideas” and “recipes for dinner.” Then Pinterest and Yummly came along, and well, that sort of helped I guess, but the actual answer came in a simple system. I give credit to my commitment to rotating protein and starch choices as that’s really what gave rise to it’s creation. So, here it is, how to know what to make for dinner every night—the easy way.
Step 1: Make a protein and starch list.
The point of the what to make for dinner system is not to make a list of foods and rotate them, that would get boring just have meatloaf night, and taco night, and so on. It isn’t a menu. Rather build a list of proteins and starches you use. For our family, for example, our protein list includes beef, pork, chicken, and fish (less often as I’m not a fish person) and our starch list includes bread, potatoes, rice, tortillas, and noodles.
Step 2: Rotate your dinner list.
The second step is just to start on a protein, start on a starch, and rotate them.
Say tonight you had beef burritos. Your protein was beef, your starch was tortilla. So, the next night you can choose any protein from your list and any starch but beef and tortilla. You pick baked chicken and rice. So, now you can pick any protein and any starch but beef, chicken, rice, and tortilla. You pick pork steaks and baked potatoes. The following night you are left with one protein choice, fish, and can choose from noodles or bread for your starch. You choose tuna, peas, and noodles. This leaves you one starch, bread, and your back on beef for your protein. Now choosing what to make for dinner just became much easier. You have narrowed your dinner recipe field to a protein and starch.
As you can see once you get this rotating and have used your list of protein and starches once, you’ll always only have one option each night. As for most of us the list of proteins is shorter than the list of starches, this prevents the starch proteins from lining up the same every time.
You certainly don’t have to religiously follow this pattern, but it helps on nights when you’re just sort of stuck and can’t decide what to make for dinner. You can just think back and find the starch protein pattern item your on. If you like, you can even build a list or recipes for each protein and starch category to choose from, and add to it as you find new and interesting dinner recipes to try.
How do you decide what to make for dinner? If you try our system please let us know if it helps!
You’d think making a cake based off an entirely square pixel game would be super easy, but when my kids wanted a Terraria birthday, I admittedly was a bit stuck on the cake. A quick Google will bring in loads of Minecraft cake ideas, but Terraria cake ideas are a little fewer and far between. So, I decided to try to use those Minecraft cakes for inspiration, but also recognize that they aren’t the same game.
One of the major differences between Minecraft and Terraria is that a good part of Terraria is played below ground. I thought then that one major difference between a Minecraft cake and a Terraria cake should then be the depth. I wanted to go vertical! Cake itself would have worked for that, but then the bottom layers would have little frosting anyway, making brownies the next logical conclusion. The resulting “cake” was really cool looking albeit a bit of a learning experience, and the brownies worked very well for our park party (no knife needed).
I will start off by saying that you don’t have to follow my cake exactly. You could skip the chocolate wall of flesh for instance or change your cave layout. I have two kids who share a birthday, so my cake also needed two large caverns for the candles. With that, how did I make this thing?
Terraria cake step one: Plan
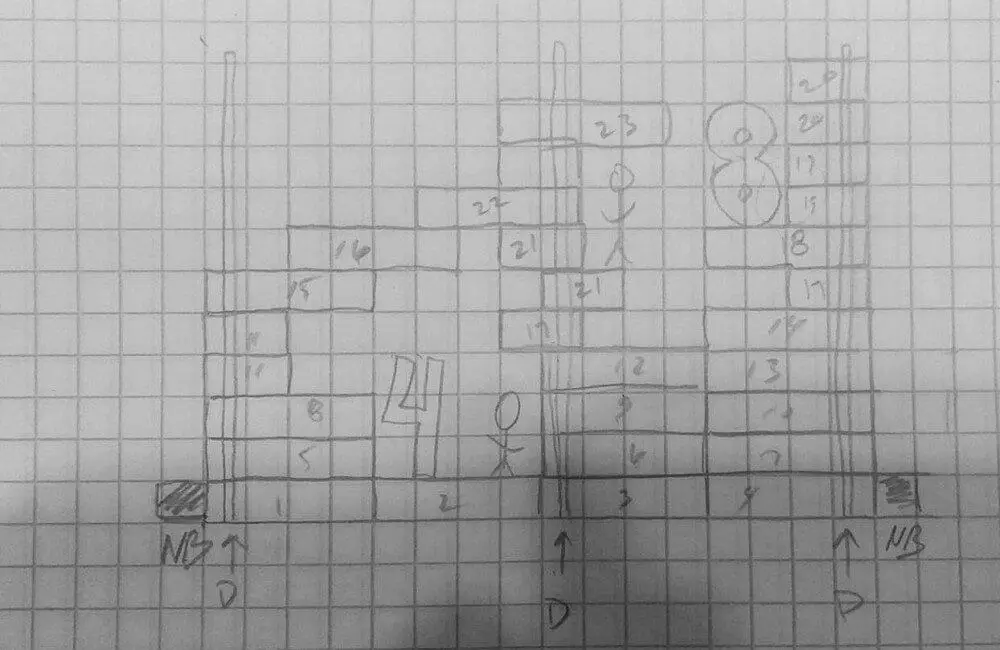
I recommend starting by baking one pan of brownies, and then measuring what size brownies you want to use as “blocks.” Mine were 4” x 3” x 1” meaning from one 13” x 9” pan of brownies I got 9 blocks (I cut the pan in half on the 9” side and in 3 rows down the 13” side (a 13 x 9 pan bakes out to roughly an 8 X 12 sheet). This allows you to take graph paper and plan out your cake. In my half-finished sketch below (sorry, I spaced taking a “done” picture) you can see what I mean. In my plan, each block on the paper represented an inch to plot how many blocks long I planned to make the cake, how many blocks high, and where the support sticks would be.
I also measured the figurines and candles I planned to use to ensure the caverns I created where tall enough for them to fit. In the end, my cake took just shy of 4 pans of brownies (I used boxed so 4 boxes) equating to 27 brownies. This is important information, because to get clean cuts with brownie, they need to fully cool. Knowing how many pans you need allows you to calculate how far ahead of time you need to start baking to assemble your cake. In places you can see some brownies were only 2” wide, I broke some brownies in half to create more cave-like shapes.
Terraria cake step two: Create a base
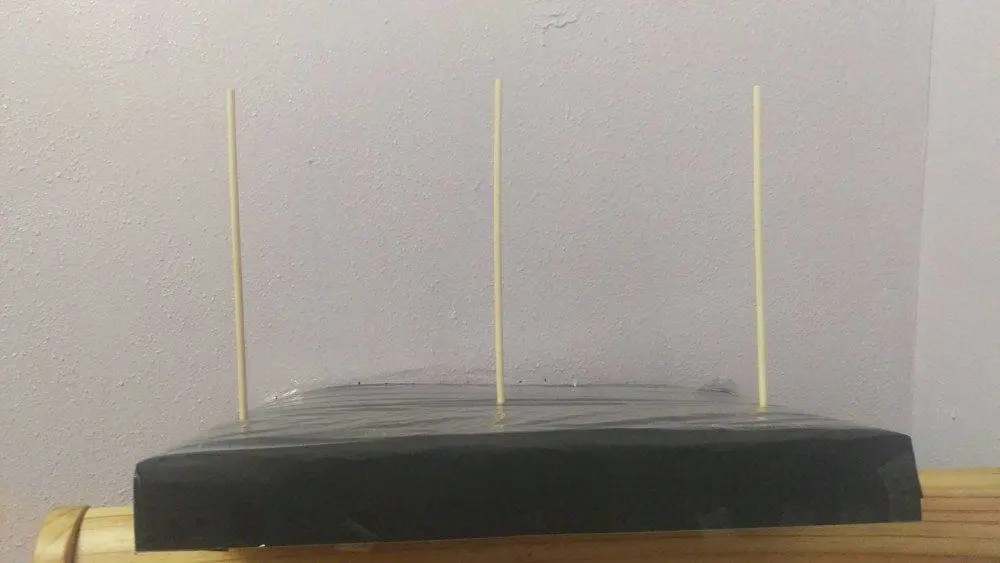
If you were going for a quite short cake, you probably wouldn’t need a support as brownies stack well, but my cake was about a foot tall, this meant building a support. I used green florist foam (mine was 18” long), wood skewers, and some poster board. In retrospect, I would have used wrapping paper on the base, as it would be easier to cover. All I did was cover my foam with the poster board, then measure where my support sticks were planned and stabbed um in there. As you can see from my unfinished plan up there, my cake was 4 blocks long (16”), with a support on the outer edge of each end and one toward the middle.
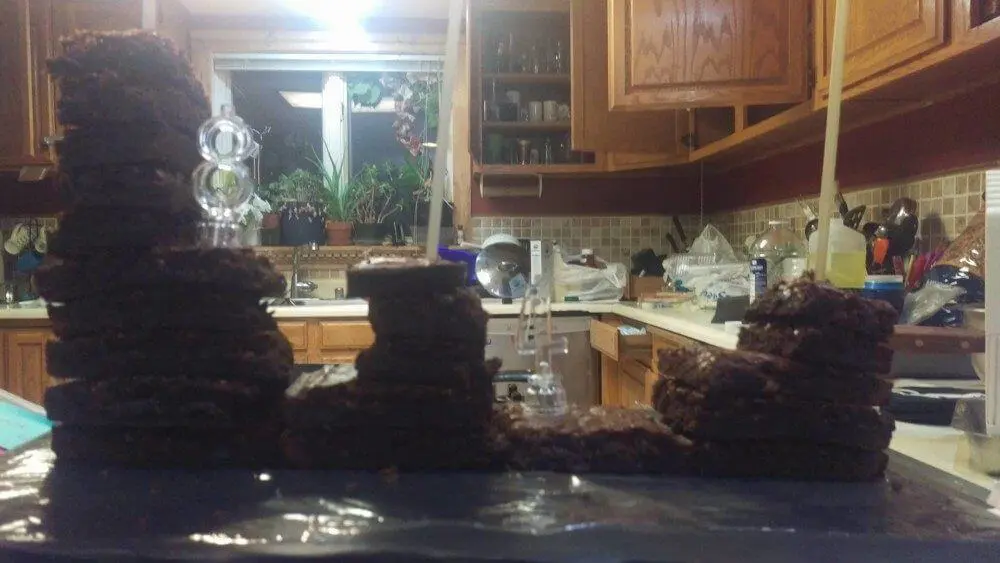
Terraria cake step three: Assemble
Assuming you have baked your brownies (as I used box brownies, I’m not providing a recipe). You simply begin sliding brownie blocks onto your supports following your plan. My plan caught a snag in that I had areas where brownie sat unsupported to form cavern roof. It ended up being too soft for this, and I had to add wood skewers horizontally beneath those brownies. I also didn’t cut those longer pieces in 4” blocks, they were left at 8” each. It’s ok if during assembly you find you have to improvise a bit.
Terraria cake step four: Decorate
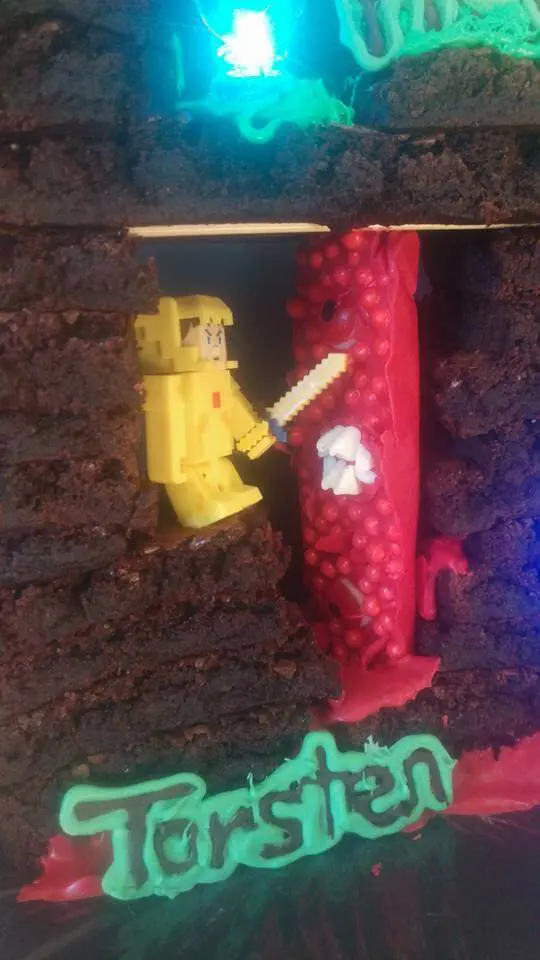
My cake had two Terraria figures. I bought them off Amazon. They, among other armor options, can be found here:
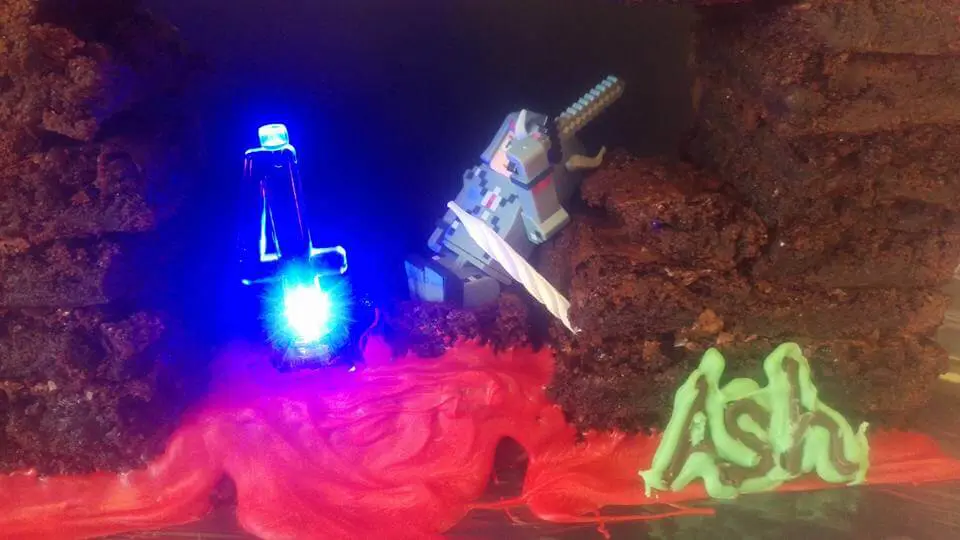
My “candles” ended up being too tall with actual candles in them, so I used flashing number bottoms with candles as torches in the walls.
The flashing number candles can be found here, but I actually found them cheaper at Walmart, so you may also check there.
My about-to-be 8 year old actually requested the wall of flesh. He was relatively easy to make, but you could easily cheat and use figurine monsters.
If you go this route, just cut a butter box in half (4-stick pack) and cover the inside with freezer paper. Then pour in red sugar pearls (sort of like sprinkles, but round), followed by prepared red candy melts. While the chocolate is still soft (before freezer-ing this is will stay soft for some time) place in gummy eye balls (also found cheaper at Walmart, but my boys have an October birthday) and then make a mouth by microwaving one red candy melt until barely soft and inserting chopped up white chocolate chip slivers. Scrape your red chocolate melting bowl and make some little wiggly lines on freezer paper, freeze them about 5 seconds, then place them into the still-soft base. Shove the whole thing in the freezer about half hour or until it comes out solid.
The lava was also made with red candy melts, just liberally put in there with a decorating bottle.
The top grass is just piped green frosting.
The “happy birthday” words were made by printing out the words I needed using this Terraria font generator. Just place your print out below freezer paper and trace it with first brown tempered chocolate and then green. When finished, place it in the freezer for hardening. This is a very easy way to make “professional” looking cake lettering by the way. I warn, this type of lettering will not handle high heat. If your party is someplace very warm, keep that in mind. It will hold up better the thicker you layer the chocolate.
And that’s it. The kids loved it. It didn’t cost me like over $100 to have made for me, and it was relatively easy.
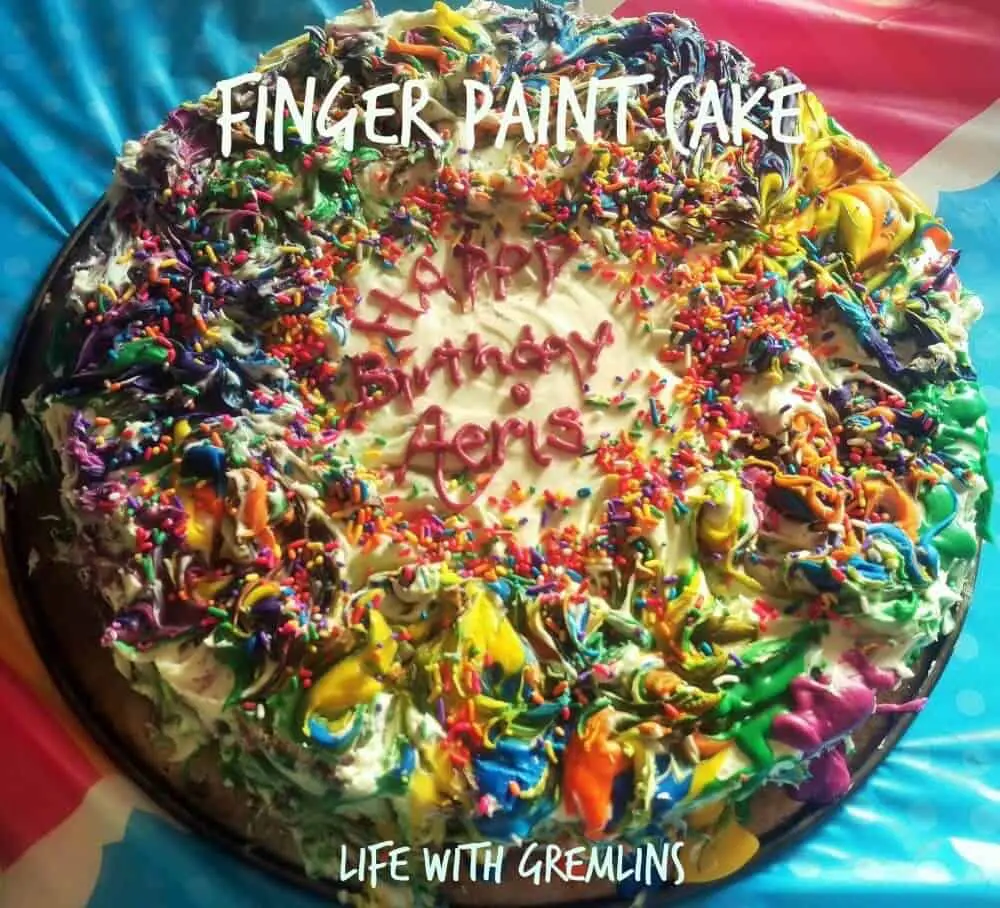
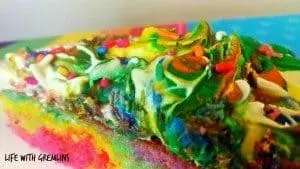
You know how sometimes when you’re browsing Pinterest for ideas something just jumps out at you, and in the back of your mind you’re thinking, “Yeah, I am probably not going to be able to do that,” but you just go for it anyway? Well, I did that. I did it in a big way. It was my daughter’s first birthday, and I absolutely had to make this amazing rainbow drip cake by Tablespoon with a few tweaks of my own, like tye dye cake and a new shape. Instead of doing this the smart way and making a practice cake well before the party so I could work out all the stupid mistakes I was bound to make, I decided to just make my first attempt a three-box, 14-inch round I planned to serve at the party the very next day. As you can imagine, I failed, and I failed hard, luckily, my cake fail turned into something equally cool, and so, Finger Paint Cake was born. I totally owned my fail. The kid’s at the party also suggested unicorn vomit cake, but while amusing, that sounded less appetizing– for the record, it didn’t taste like vomit.
First, on the off chance you found this blog trying to make that rainbow drip cake, where did I go wrong? I’m not a fan of melting candies, so I used white chocolate ganache. When I made the various colors I used cold bowls, this cooled my ganache. Then I dripped it on to cold whipped cream frosting rather than room-temp buttercream, the effect was the moment my ganache hit my frosting it instantly set, which to me, looked a lot like dried paint blobs, so I went with it, I grabbed a cake pop stick and screwed the colors all up to make it look like a child’s finger paint mess. So, if you want to make rainbow drip cake, warm your small bowls before mixing and don’t use a cold frosting. If your ganache cools too much, microwave it a bit.
Alright, so there’s tips on how to make the cake I failed to make, how do you make my awesome cake fail?
First, you need to pick a pan. I used a 14-in round, because I was feeding a crowd and didn’t really want a 13 x 9. I also made a 6-in smash cake. You could easily do this in any type or size pan, with layers or without to fit your needs. The quantities below were enough for what I used, so if you size down, keep that in mind. For instance, an 8-in round layer cake would only use one cake batch. I originally used three cake mixes, but my 6-in turned out super tall and I had way too much trim that way, two boxes would be fine.
Ingredients:
For the cake: -2 boxes (or 2 batches of your own recipe equivalent) white cake
-Food dye in your desired colors
Optional: -3 teaspoon almond extract (I like to add this to my white cakes for flavor)
For base frosting:
-2 cups heavy cream
-1 tablespoon powdered sugar
For “finger paint” ganache:
-3 cups white chocolate chips
-1 cup heavy cream
-Gel food coloring (note: on the cake batter, I used liquid food coloring, but on the frosting I used gel. I don’t know if liquid would work the same here.)
Instructions:
For the cake:
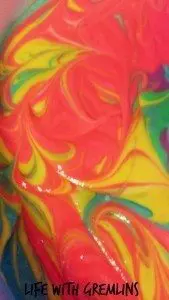
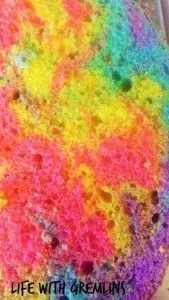
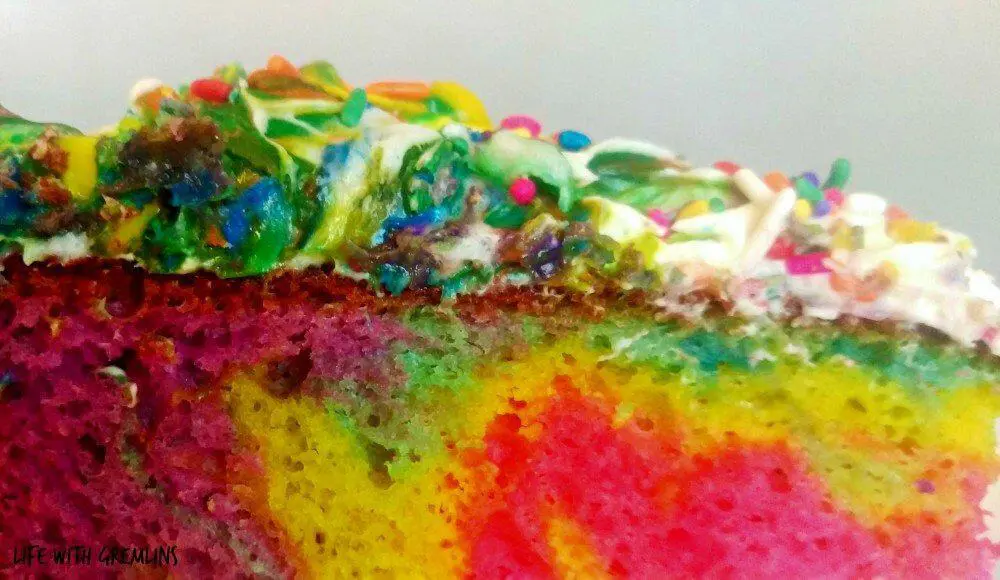
Make your cake batter as directed. If you went with box cake like I did (I know I’m lazy) you can easily doctor it up a bit by switching the water for milk and adding one pudding pack (I used cheesecake pudding). Then separate your batter into equal portions and add food color to your desired shade. I used random colors from my huge leftover food coloring tin (yes, I bake a lot) including neon purple, neon yellow, neon blue, neon pink, and standard green. These were just liquid dyes you can find in almost any grocery store (the neon and standard packs). Next begin alternating globs of colored batter in your cake pan. Once all the batter is in, it helps to take a long thin object (I used a cake pop stick) to sort of swirl the colors. You can see what I mean better below. This was my cake pre-and post-bake.
Bake as directed and set aside to cool. Once cool, trim your cake level if desired.
For the base frosting:
In a large bowl mix 8 oz cream cheese with half a stick of butter until smooth. Add 2 cups powdered sugar. This will look lumpy at first, just keep blending, it will smooth out. Set this aside.
In a new bowl (that’s important), combine 2 cups heavy cream with a teaspoon vanilla and beat until stiff peaks form. It helps if your bowl and beaters have been chilled. I just throw mine in the freezer for a bit before beginning.
Gently fold both mixtures together, frost your cake and store in the fridge.
For the finger paint ganache:
Place 3 cups white chocolate chips in a bowl. Heat 1 cup heavy cream on your stove top until almost boiling, pour the cream on top of the chips and stir until smooth. Separate into small bowls and add the gel food coloring of your choice. I used AmeriColor Fushia, Leaf Green, Orange, Royal Blue, and Lemon Yellow. These are all in the student 12-pack kit.
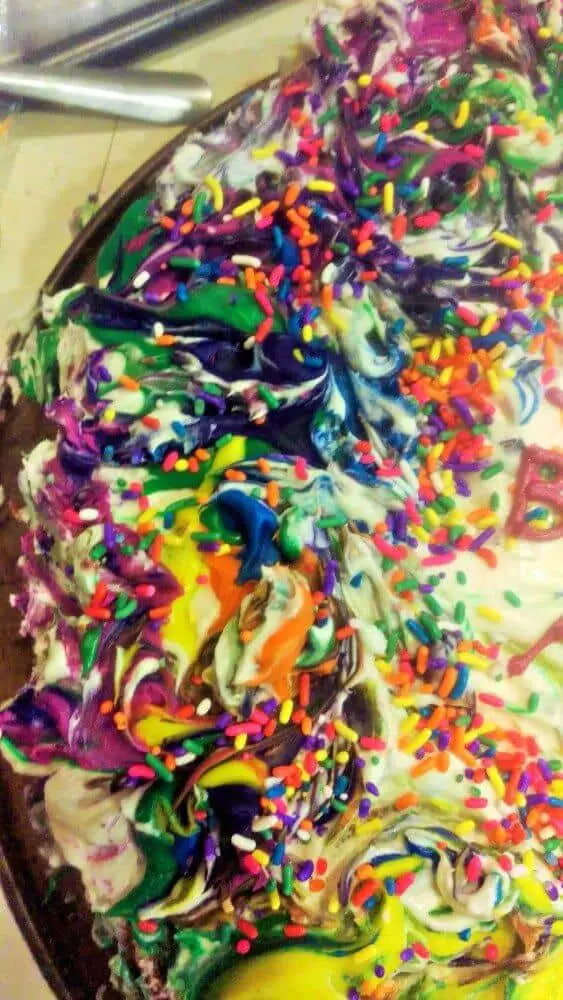
Randomly blob the colors all along the cake, then use a thin object (again, I used a cake pop stick, a straw or a kabob stick would also work great) to just sort of swirl and twist the colors all around. It isn’t an exact science, it’s hard to mess up (because it was born of a mess I’d already made) it’s suppose to look like a child’s paint mess. Your under white layer will sort of mix in, and that’s fine. It provides contrast.
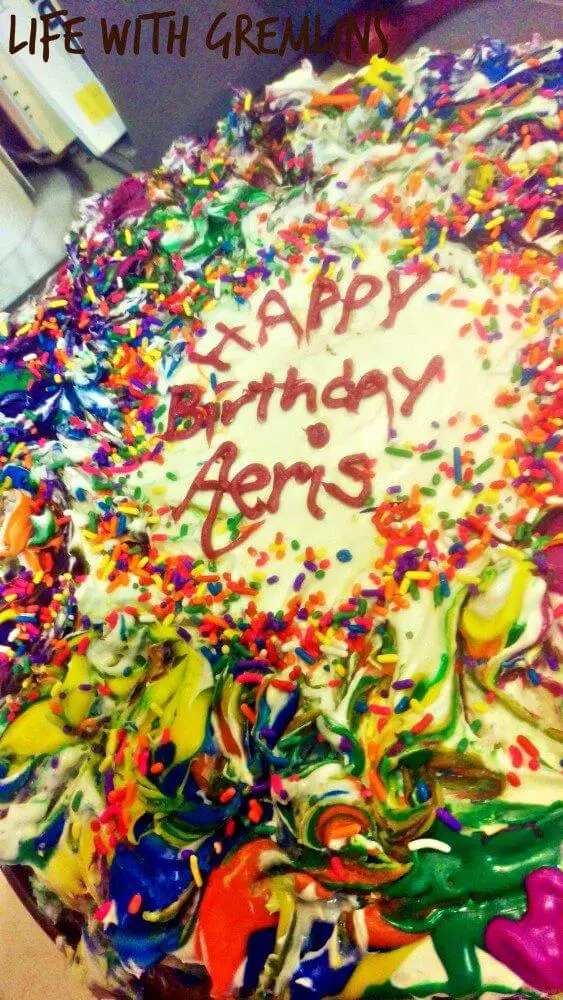
I left a ring in the center for writing and added sprinkles to transition the edges, but you could do a full cover with this and add sugar letters or candle letters if you need to write a message. This cake would be a great for an art-themed party or just anyone who digs bright colors.

 to rotating protein and starch choices as that’s really what gave rise to it’s creation. So, here it is, how to know what to make for dinner every night—the easy way.
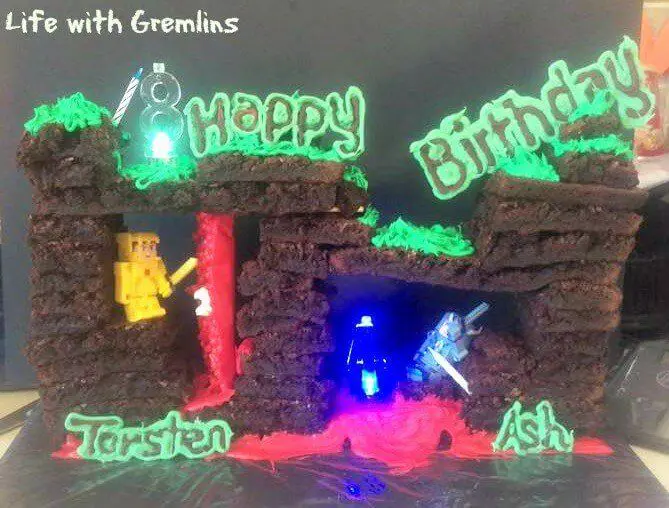


 You know how sometimes when you’re browsing Pinterest for ideas something just jumps out at you, and in the back of your mind you’re thinking, “Yeah, I am probably not going to be able to do that,” but you just go for it anyway? Well, I did that. I did it in a big way. It was my daughter’s first birthday, and I absolutely had to make this amazing