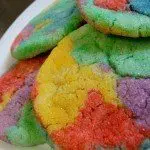
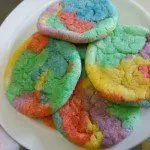
When our sons 6th birthday rolled around, I wanted to be the cool mom who brought in super-holy-cow-awesome treats for his class, sadly, the school’s policy did not feel that should be easy. All treats had to be low fat and healthy. I thought I was going to be clever and make Nutella covered strawberries, but let me just save you a tub of Nutella, the net lies. The oil from the hazelnuts causes the melted chocolate to slide off as it cools rather than harden like plain chocolate does. In a last minute what-the-heck-am-I-going-to-make situation, I ended up making tie dye sugar cookies instead, and they were a huge hit with the kindergartners, though I got shifty eyes from the teacher for breaking the low-sugar rule. Oops.
Anyway, let’s get down to why you likely landed on this tie dye sugar cookie recipe page in the first place, to find out how to make tie dye sugar cookies.
The base sugar cookie recipe for this is just off the back of my sugar bag. I didn’t come up with it, and I don’t take credit for it. It is however, a great just plain sugar cookie recipe if done correctly.
Ingredients for tie dye sugar cookies:
-2 ¾ cup flour
-1 tsp baking soda
-1/2 tsp baking powder
-1 large egg
-1 tsp Vanilla (I recommend getting the real deal rather than imitation)
-1 ½ cups sugar
-1 cup softened butter
-Food coloring of your choice
A note on butter: You must soften your butter on the counter over time. Do not use cold butter and do not use microwaved butter. Either will result in tie dye sugar cookies with poor texture.
You’ll also need:
-Plastic gloves
Directions for making tie dye sugar cookies:
Pre-heat your oven to 375.
Cream butter and sugar together in a large bowl. Add egg and vanilla and mix. Add baking powder, baking soda and flour use a large spoon to mix until combined, then use your hands (washed) to smash into a proper dough. (You can do it all with a spoon, but I promise this is easier.)

Make each portion into a bowl shape in its own bowl, and then drop food coloring into the indention. The more food coloring you use, the darker the color will be. Put on gloves. You can do this without gloves, but you’ll have tie dye hands for the next week. Squish each dough until the desired color is reached. You may need to add more coloring.
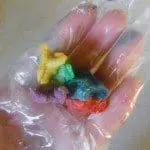
Once completed, take a pinch of each color and roll it into a ball. Note that I said roll and not squish. If you over mix the dough colors, they’ll come out brown—kind of like an unsupervised kid’s finger painting project. Roll each cookie ball in sugar and then place on a cookie sheet. I recommend using the big commercial ones if you bake a lot. They allow 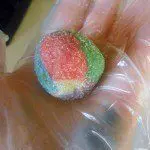
Alternately, you can take each dough ball and create a tie dye log by rolling each ball into a snake shape, winding the shapes together and and slicing the log for cut-out cookies. I prefer the shape of ball tie dye sugar cookies, plus they are easier to roll in sugar.
Bake for 8 to 10 minutes or until edges are set. Pull and allow to cool for 2 to 3 minutes before removing from the pan.

