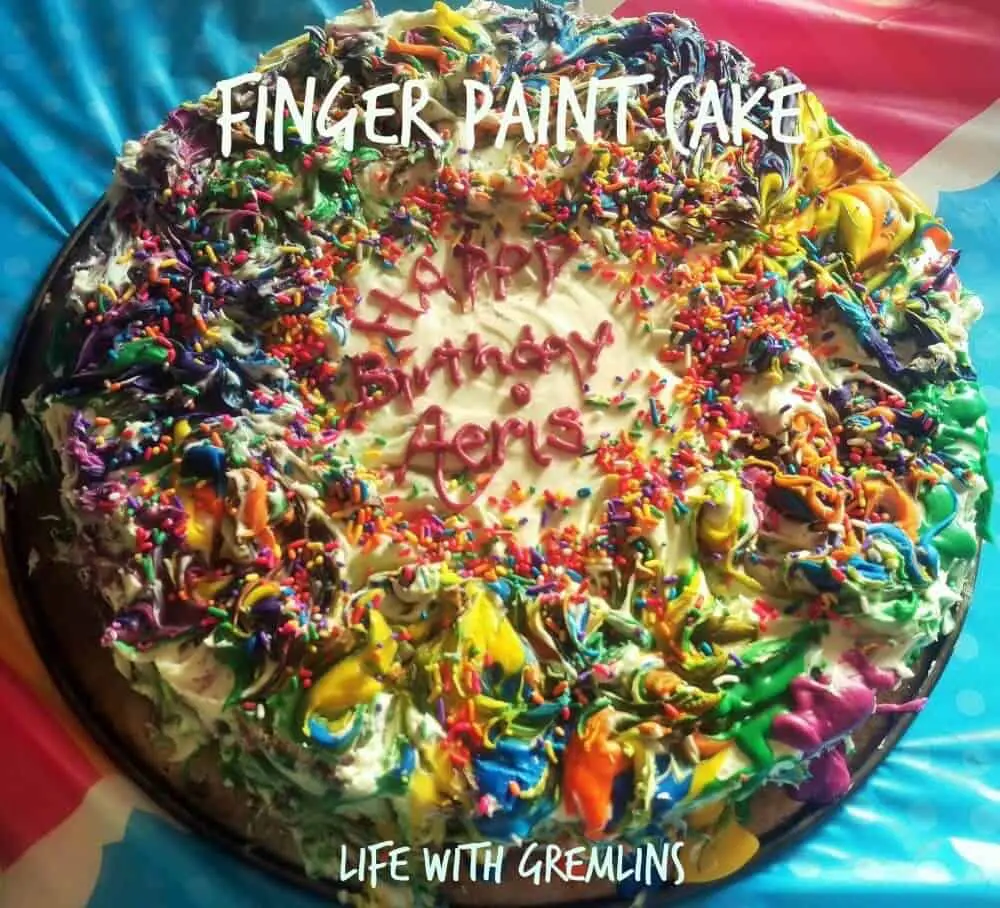
 You know how sometimes when you’re browsing Pinterest for ideas something just jumps out at you, and in the back of your mind you’re thinking, “Yeah, I am probably not going to be able to do that,” but you just go for it anyway? Well, I did that. I did it in a big way. It was my daughter’s first birthday, and I absolutely had to make this amazing rainbow drip cake by Tablespoon with a few tweaks of my own, like tye dye cake and a new shape. Instead of doing this the smart way and making a practice cake well before the party so I could work out all the stupid mistakes I was bound to make, I decided to just make my first attempt a three-box, 14-inch round I planned to serve at the party the very next day. As you can imagine, I failed, and I failed hard, luckily, my cake fail turned into something equally cool, and so, Finger Paint Cake was born. I totally owned my fail. The kid’s at the party also suggested unicorn vomit cake, but while amusing, that sounded less appetizing– for the record, it didn’t taste like vomit.
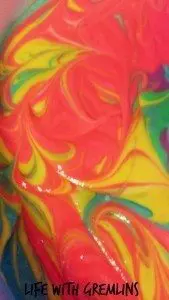
First, on the off chance you found this blog trying to make that rainbow drip cake, where did I go wrong? I’m not a fan of melting candies, so I used white chocolate ganache. When I made the various colors I used cold bowls, this cooled my ganache. Then I dripped it on to cold whipped cream frosting rather than room-temp buttercream, the effect was the moment my ganache hit my frosting it instantly set, which to me, looked a lot like dried paint blobs, so I went with it, I grabbed a cake pop stick and screwed the colors all up to make it look like a child’s finger paint mess. So, if you want to make rainbow drip cake, warm your small bowls before mixing and don’t use a cold frosting. If your ganache cools too much, microwave it a bit.
Alright, so there’s tips on how to make the cake I failed to make, how do you make my awesome cake fail?
First, you need to pick a pan. I used a 14-in round, because I was feeding a crowd and didn’t really want a 13 x 9. I also made a 6-in smash cake. You could easily do this in any type or size pan, with layers or without to fit your needs. The quantities below were enough for what I used, so if you size down, keep that in mind. For instance, an 8-in round layer cake would only use one cake batch. I originally used three cake mixes, but my 6-in turned out super tall and I had way too much trim that way, two boxes would be fine.
Ingredients:
For the cake:
-2 boxes (or 2 batches of your own recipe equivalent) white cake
-Food dye in your desired colors
Optional: -3 teaspoon almond extract (I like to add this to my white cakes for flavor)
For base frosting:
-2 cups heavy cream
-1 tablespoon powdered sugar
-2 cups powdered sugar
-8 oz cream cheese
-1/2 stick butter (1/4 cup)
-1 teaspoon vanilla extract
For “finger paint” ganache:
-3 cups white chocolate chips
-1 cup heavy cream
-Gel food coloring (note: on the cake batter, I used liquid food coloring, but on the frosting I used gel. I don’t know if liquid would work the same here.)
Instructions:
For the cake:
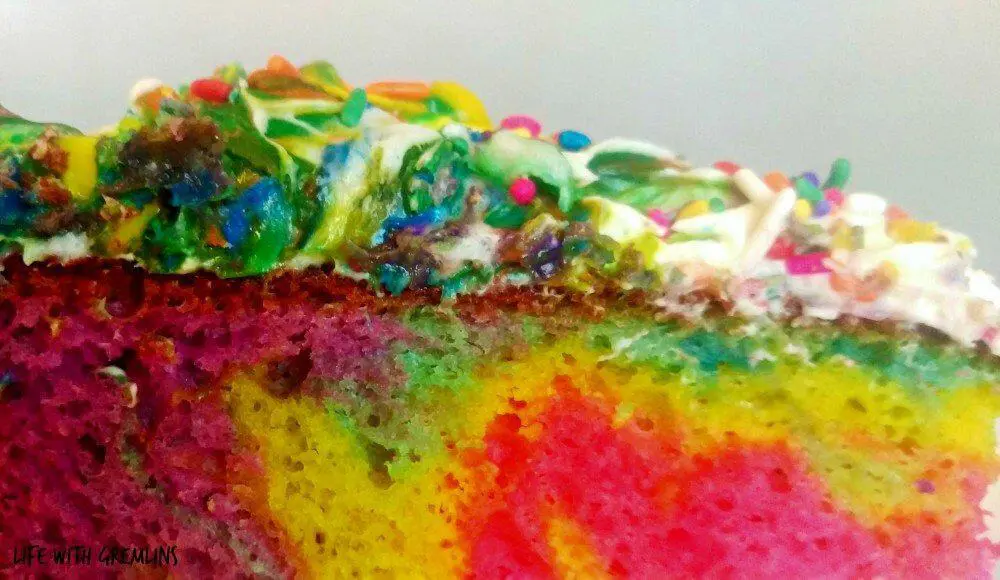
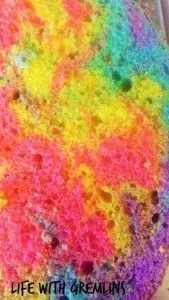
Make your cake batter as directed. If you went with box cake like I did (I know I’m lazy) you can easily doctor it up a bit by switching the water for milk and adding one pudding pack (I used cheesecake pudding). Then separate your batter into equal portions and add food color to your desired shade. I used random colors from my huge leftover food coloring tin (yes, I bake a lot) including neon purple, neon yellow, neon blue, neon pink, and standard green. These were just liquid dyes you can find in almost any grocery store (the neon and standard packs). Next begin alternating globs of colored batter in your cake pan. Once all the batter is in, it helps to take a long thin object (I used a cake pop stick) to sort of swirl the colors. You can see what I mean better below. This was my cake pre-and post-bake.
Bake as directed and set aside to cool. Once cool, trim your cake level if desired.
For the base frosting:
In a large bowl mix 8 oz cream cheese with half a stick of butter until smooth. Add 2 cups powdered sugar. This will look lumpy at first, just keep blending, it will smooth out. Set this aside.
In a new bowl (that’s important), combine 2 cups heavy cream with a teaspoon vanilla and beat until stiff peaks form. It helps if your bowl and beaters have been chilled. I just throw mine in the freezer for a bit before beginning.
Gently fold both mixtures together, frost your cake and store in the fridge.
For the finger paint ganache:
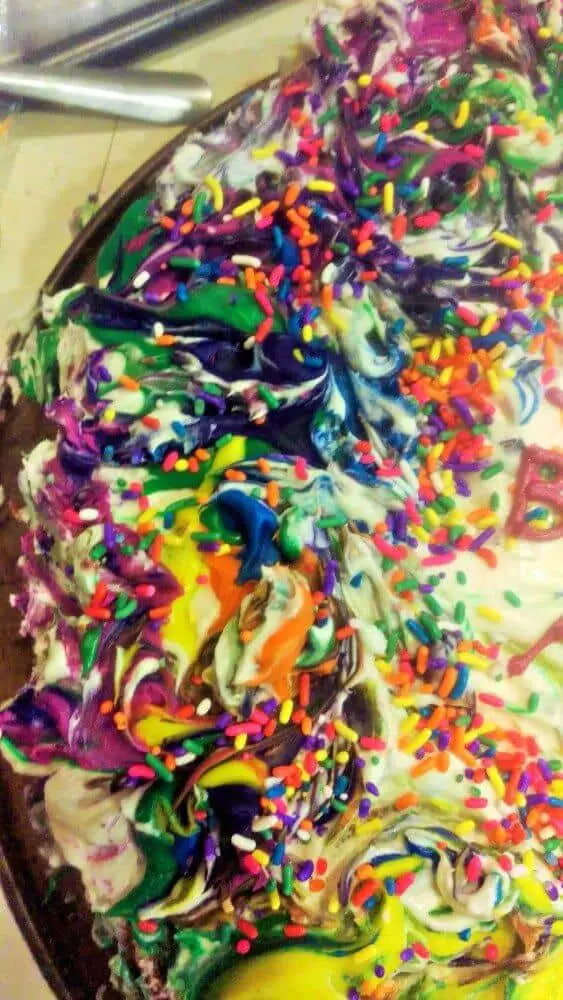
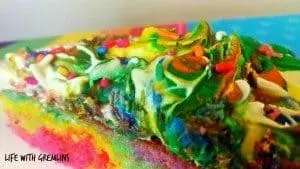
Place 3 cups white chocolate chips in a bowl. Heat 1 cup heavy cream on your stove top until almost boiling, pour the cream on top of the chips and stir until smooth. Separate into small bowls and add the gel food coloring of your choice. I used AmeriColor Fushia, Leaf Green, Orange, Royal Blue, and Lemon Yellow. These are all in the student 12-pack kit.
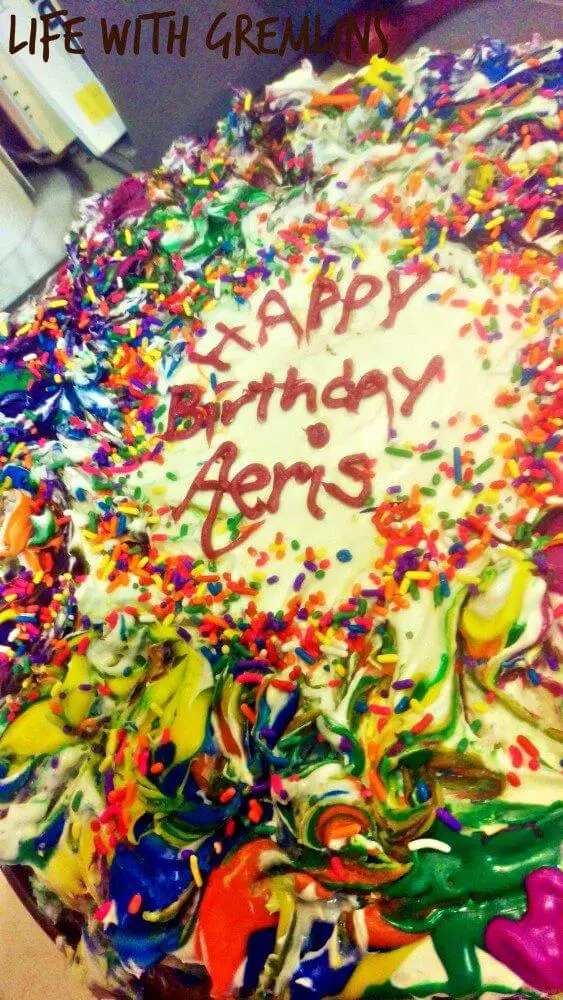
Randomly blob the colors all along the cake, then use a thin object (again, I used a cake pop stick, a straw or a kabob stick would also work great) to just sort of swirl and twist the colors all around. It isn’t an exact science, it’s hard to mess up (because it was born of a mess I’d already made) it’s suppose to look like a child’s paint mess. Your under white layer will sort of mix in, and that’s fine. It provides contrast.
I left a ring in the center for writing and added sprinkles to transition the edges, but you could do a full cover with this and add sugar letters or candle letters if you need to write a message. This cake would be a great for an art-themed party or just anyone who digs bright colors.